New year is a time when kids and families spend time together, hoping for a great year ahead. To help you spend quality time, Nimmy’s Art conducted a New Year Art Workshop for kids and families to enjoy together.
We invited the entire Nimmy’s Art family to join us. For us, art is the medium to connect with families. Our free art classes and art lessons provide an opportunity to bond with kids, grandparents and siblings. We decided to create a beautiful painting of Olaf, from Frozen, as it’s a very popular Disney character that we all absolutely love.
For us at Nimmy’s Art, we bring the feeling of togetherness through our online courses, art lessons and free online workshops. Our art courses have not just promoted art learning through our wide-ranging artworks but also fun during the learning process.
Our happiness knew no bounds when family members of all ages joined together to attend this free online workshop.
Join us and follow this step by step tutorial to paint this cute Olaf.
New Year special art – How to paint Olaf in Acrylic.
How to draw and paint Olaf
Materials needed
- Liquitex Acrylic Paint Starter set
- Paint Brushes – 1 big flat brush, 1 medium round, 1 small round
- Canvas 8″ X 10″
- Palette
- Paper towel
- A bowl of water
- Pencil
- Eraser
- A black sharpie
Colors used
- Dioxazine purple
- Primary blue
- Titanium white
- Mars black
- Cadmium orange
- Primary yellow
- Primary red
Every complex drawing is built of simple structures underneath it. In our online art classes, kids are encouraged to identify the basic shapes in a subject. This skill builds a strong foundation and with practice, makes it possible for our students to draw any real life subject.
Let’s begin drawing the basic structure of Olaf.
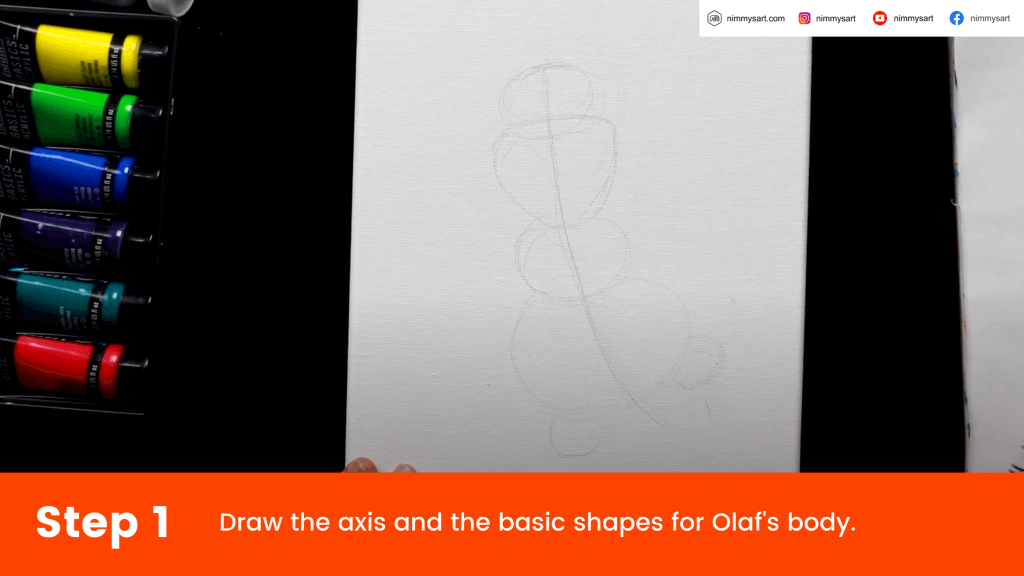
Draw Olaf – a diagonal curved line for the axis, an oval and triangle for the head, two ovals for the body, and two ovals for feet.
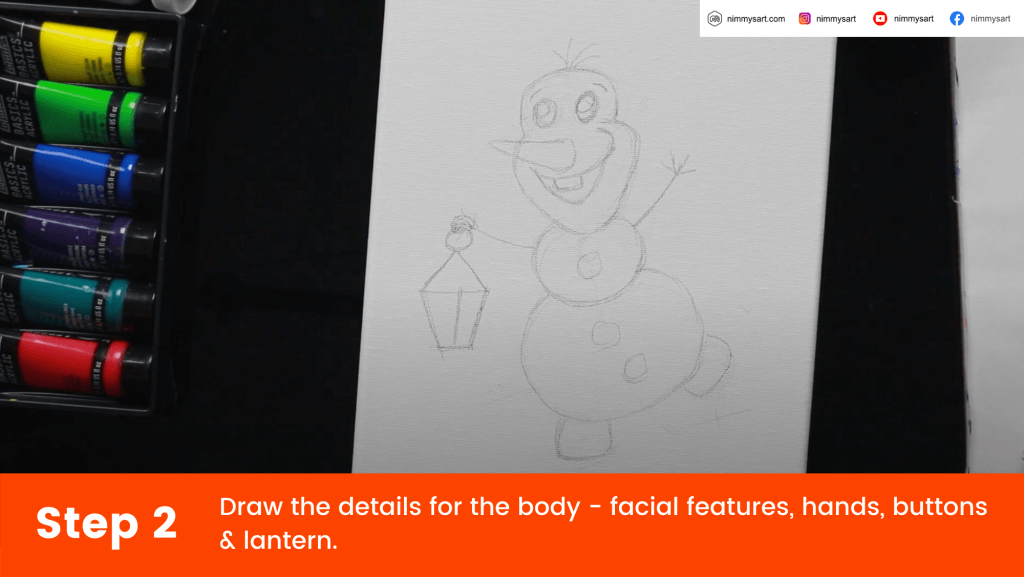
Draw the eyes, mouth, nose, buttons, hair, hands and the lantern.
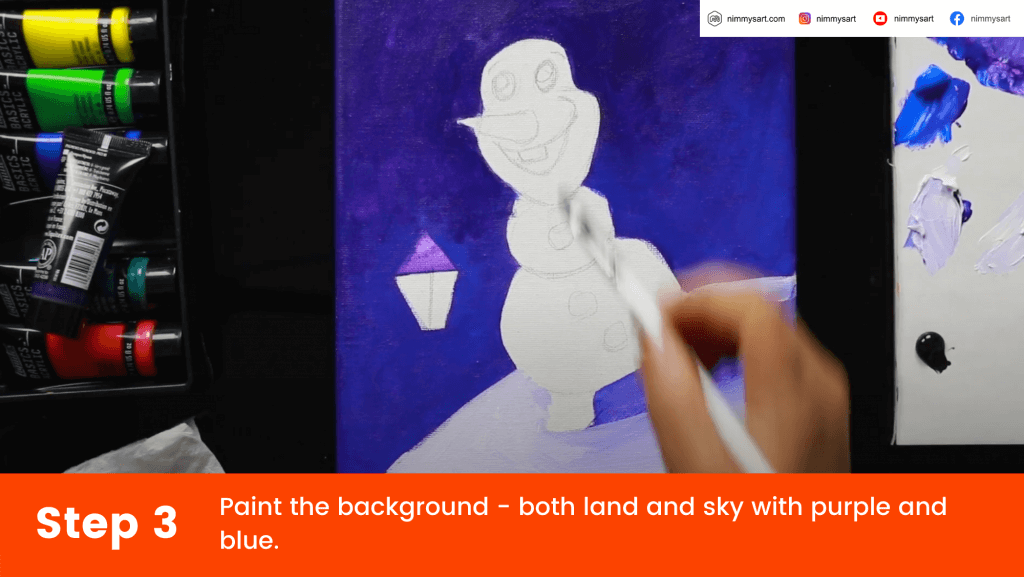
Paint the background – both land and sky with the base layers.
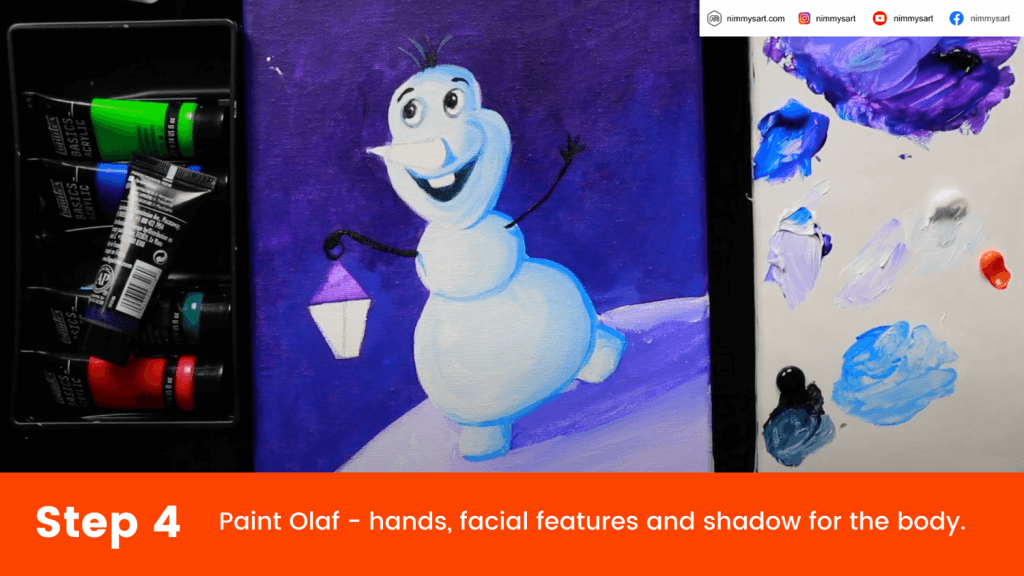
Next, paint the shadow, the eyes, mouth, buttons, hands and lantern.
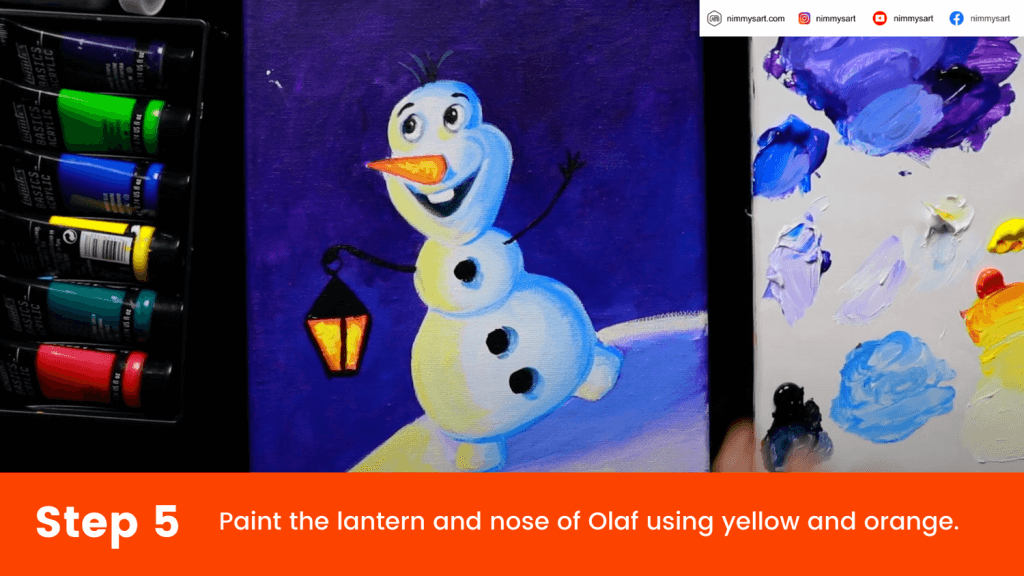
Now, paint the lantern, Olaf’s nose and the yellow light falling on Olaf’s body and land.
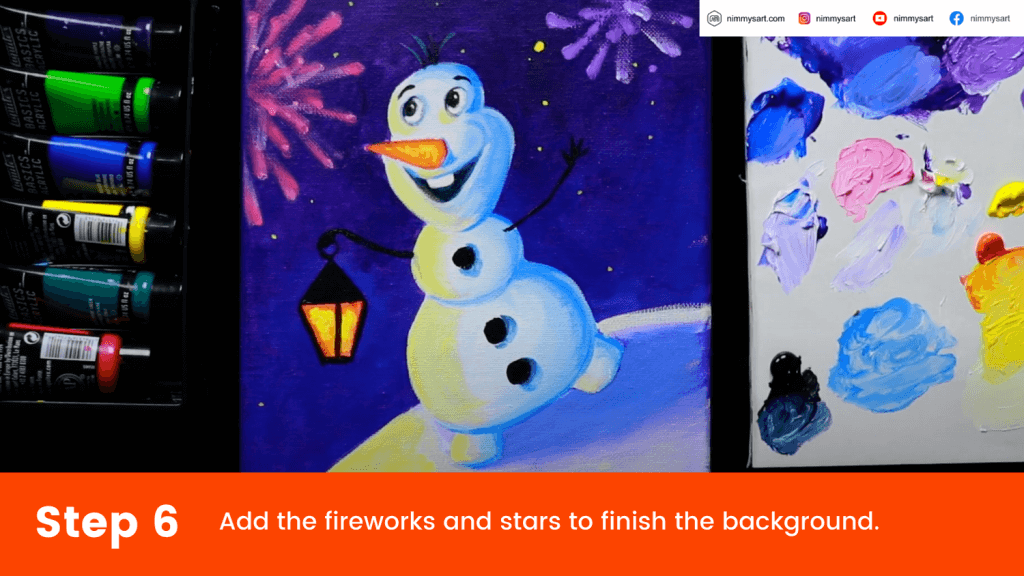
Add the fireworks using small dots of paint and brush them to the center using your finger. Add small dots for stars.
- Use a small round brush to paint small details like facial features, lantern outlines and hands.
- Use a medium round brush to paint the body and shadow areas.
- A large brush works best for the background base layers.
- You can optionally outline using the sharpie after sketching, or after painting.
And our happy Olaf painting is ready!
Tips:
- Multiple layers of paint give a rich look.
- Although acrylic paint is water-based, use only a drop or two of water while using it.
- To clean up the brushes, use a mild soap immediately after painting. This helps for a longer brush life.
Enjoy your happy Olaf and share your artworks because we absolutely admire them!
Looking to attend another of these free and fin art workshops? Join our next free art class to create another beautiful painting.
Share about the class with your friends and let’s all have more fun together.

